

For those of you familiar with the original Weather Workbook, this is the original mode of operation for users to connect Excel to the Visual Crossing Weather Server and retrieve, live, parameterized queries. This version differs from the new version that focuses on retrieving scheduled CSV datasets built using the new QueryBuilder and producing downloadable files in “MyDatasets”. In this blog entry we will reiterate how users can use the legacy version of Weather Workbook, which uses live weather queries, and modify query parameters as necessary to request specific weather queries for changing locations and dates.
There are two types of weather data that we will be querying: Historical Weather and Forecast Weather. Historical data is weather data that has been collected in the past and is available through current day. All weather collected at your requested location(s) will be returned as a table. The Forecast data is predicted weather conditions for the following 15 days from today.
If you are interested in learning about all the features of the Weather API you can visit the documentation page: Weather API Documentation
If you have questions about the weather variables and their definition you can review the following: Weather Data Documentation.
Let’s dive into the Weather Workbook and retrieving data in Excel.
What is the Weather Workbook?
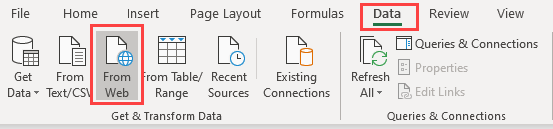
The Weather Workbook is a standard Excel Workbook with defined URL queries to call out to the Visual Crossing Weather Data Service to get weather data and bring it into your workbook. It uses the built-in Excel Power Query feature to execute all data fetches. If you are not familiar with this feature, simply open any workbook, click on the ‘Data’ menu and click on the button titled “From Web” as seen below:
If you click on this button, Excel will ask you for a URL from where it can retrieve data. As described in our technote: How to Load Weather Data into Microsoft Excel using a Web Query Data Connection a complete URL will fetch the data immediately for you. It is not required that you try this functionality at this time, the workbook does it for you.
Here’s how: This Power Query (“From Web”) functionality automatically builds a connection and defines the query for you based on the URL you enter. The data that comes back is automatically detected and put into columns with data types. It is a simple-to-use but powerful data query mechanism that any user can take advantage of.
The Weather Workbook has two of these queries predefined for you: One is for getting a Forecast dataset and one to get a Historical weather dataset. The difference between the queries in the Weather Workbook and the example above is that these queries are dynamically built from cell values in the workbook and entered by users. We will show you some of this infrastructure below and will do a more technical follow-up blog for advanced users.
As mentioned above, the Weather Workbook queries are dynamic. Every URL call to the weather server must tell the server 1) what type of query it makes 2) The locations to get weather for 3) optionally provide dates if you are making a historical query 4) your API Key 5) Units of measure (metric vs US) 6) Hourly vs Daily data level 7) Other advanced options. The job of the workbook is to take the user’s values for these parameters and modify the URL to send to the server. The “Weather Query” sheet shown below allows end users to simply enter values and submit the query. This data is concatenated into the URL that will tell the server what data you want. After all data is entered, simply refreshing the Query will bring back your data.
How do I get the Weather Workbook?
Just download the Weather Workbook from the following link on the Visual Crossing Github:
DOWNLOAD THE WEATHER WORKBOOK
Other weather workbooks are available on the GitHub: Weather Workbooks on GitHub
Once you save this workbook to your desktop, simply run the Excel Workbook just as you would any other workbook you use.
You will also need to have an API Key to send with the query so the server can authenticate your request as being from a registered user. Trial accounts and some paid accounts will provide you with API Key access. To sign up for an account, please follow the steps in this technote: How to Sign up for an API Account
Once you have an account, sign in and click on the “Account” button after signing in and copy the API Key. You will use this below when making your first query.

A Note on Privacy
When you first open the workbook or possibly when you make your first query, the Excel system will warn you that this workbook is making external queries with the data you enter.
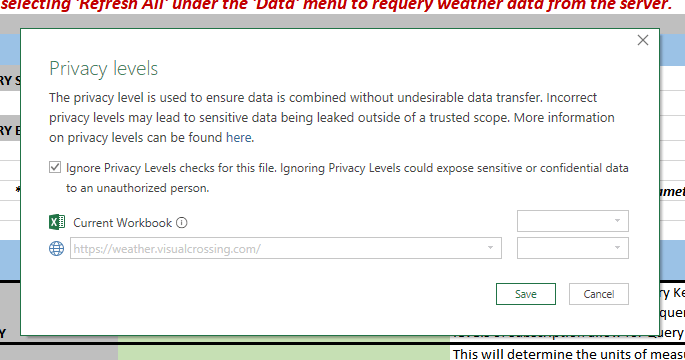
One simple solution is to check the ‘Ignore’ option and continue on. If you are concerned about Privacy or have Corporate policies to adhere to, then please visit the following page on the Microsoft support site to properly set up your Privacy options for Power Query. Power Query Privacy Page Also, if you want to know the exact string that is being sent as a query URL, click on the ‘AdminSettings’ sheet of the Weather Workbook and you can verify all data sent.
Making your first Weather Data Query
The first step is to open the Weather Workbook in Excel. Once opened you will find 5 Sheets represented as tabs of your workbook at the bottom of the Excel application:

These tabs are as follows:
Introduction – This Sheet tells you all about the Weather Workbook and gives you some helpful links in getting started. Including the link to sign up for the service and getting an API Key.
Weather Query – This Sheet is the user page and where they will enter in data such as Locations, Historical Dates and more.
HISTORY DATA – This Sheet contains the history query definition and shows the data returned from the historical query.
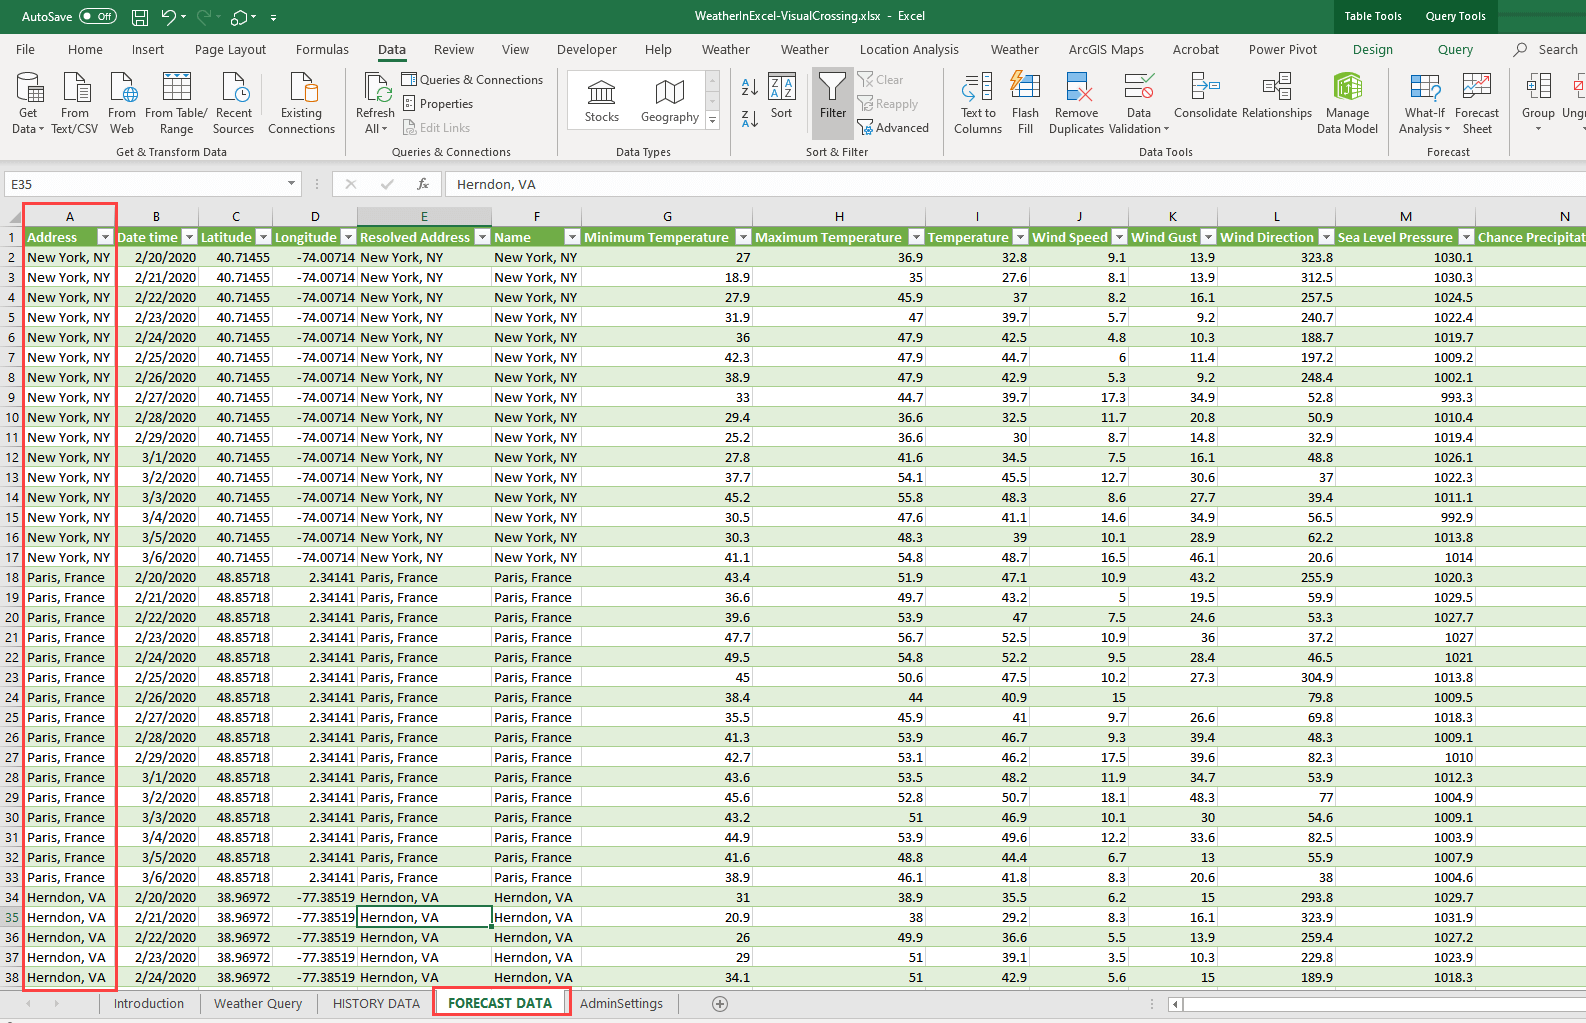
FORECAST DATA – This Sheet contains the forecast query definition and shows the data returned from the forecast query.
Admin Settings – This Sheet has some settings to help build the URL Query Strings. Users can copy the final URL if they want to use the Weather Workbook as a query builder for creating weather strings for other systems. This sheet should not be modified.
To make your first query, simply click on the “Weather Query” sheet. We will fill in four data sections: API Key, Locations, Start/End Dates, Hour Aggregation Level.
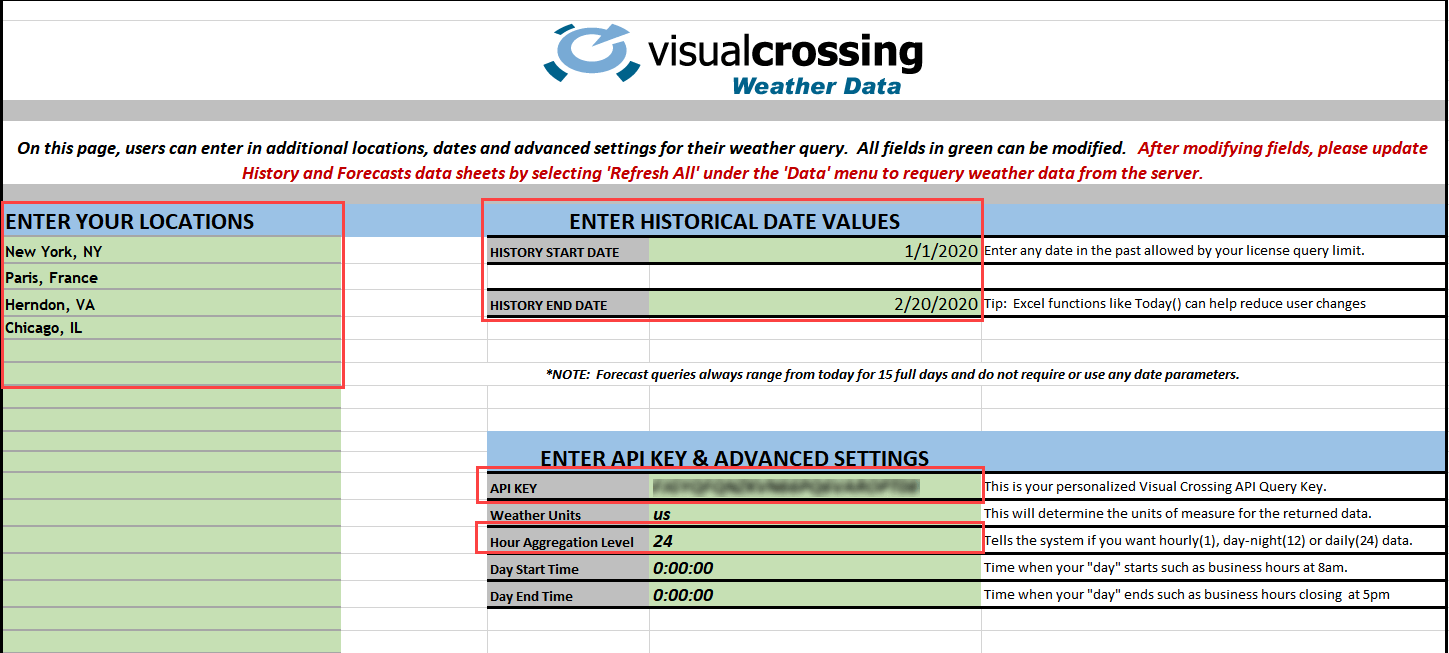
PLEASE NOTE: All user-editable sections in this workbook are color coded with a green background. Let’s get started:
Step 1 – The most important step is to enter in your private API Key into the green box next to the “API KEY” label.
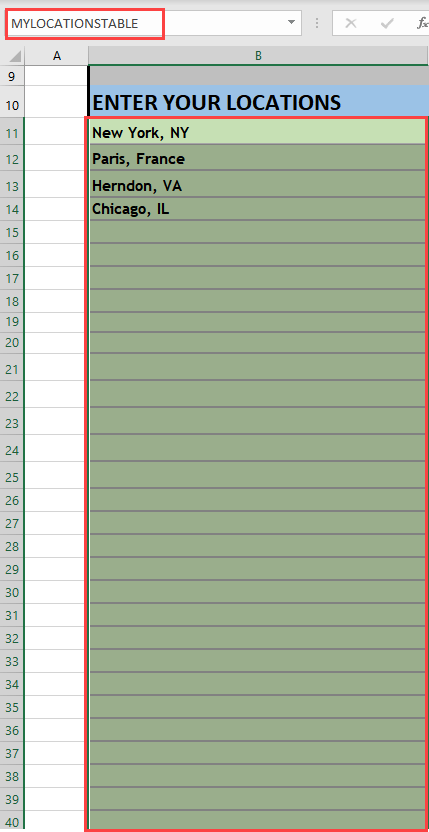
Step 2 – In the ‘ENTER YOUR LOCATIONS’ section at the left, enter a few locations that you wish to query on. These can be addresses, cities, zip codes, etc… The number of locations you can pass in at one time is limited by your license so be aware of your limits here.
Step 3 – Next, for our Historical Query we will enter in a start date and end date. Please note, the workbook by default uses the TODAY() Excel function to always populate the end date with our current date. Functions like these are invaluable to creating a workbook that requires minimal changes. You can easily overwrite the cell value with any dates you wish. NOTE: when setting the start/end date, please make sure not to choose a timeframe or aggregation level that will retrieve extreme dataset sizes. Remember that there are limitations both on your license as well as to the amount of data Excel can query. Visual Crossing supports data back for hundreds of years, so it is easy to request too much. Also, if for some reason you need a bulk set of data that is larger that a typical query, please contact support and ask about the bulk data option.
Step 4 – Change the “Hour Aggregation Level” To the value: 24. There are only three options in the popdown: 1 = Hourly Data, 12 = Day/Night Data every 12 hours, 24 = Daily totals every 24 hours.
FINAL STEP – Now that we have our Historical and Forecast Queries defined, we can fetch the data simply by using the ‘Refresh’ functionality of the Excel Power Query system. To do this, click on the ‘Data’ menu and click on “Refresh All”.
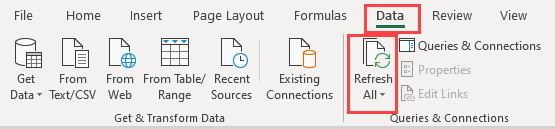
This action will refresh every query in the workbook. Below, we describe other options you have for submitting/refreshing queries. We can now click over to either our FORECAST DATA or HISTORY DATA Sheets and see the results of our query with the locations we requested.
Refreshing Data
One of the first questions users have is about the need to click on “Refresh All” to update the data. Users can simply right-click on the datasets and refresh Forecast or History independently. There are many other refresh options here that you can choose to add and those are defined in the following technote: Refresh Query Data in Excel
We gave strong consideration to adding custom refresh buttons for users to click, but that would require the use of adding Macros through the VB infrastructure in Excel which not all users could utilize due to security restrictions and VB library usage. If you would like to add your own buttons for refresh you can accomplish that with the following steps: 1 – turn on your Developer option such that the ‘Developer’ menu appears in Excel. On the main Excel toolbar choose File->Options and add the Developer menu to the Ribbon Bar. 2 – On the ‘Developer’ menu and click to record a Macro where you click on the dataset in question and click ‘Refresh’ 3 – On the same menu, insert a button and assign your new macro. You can draw this button on any page you wish and name it how you prefer.
There are many good options and if you need help just contact www.visualcrossing.com/support/
How do I Customize or Integrate this into my Workbooks?
The Weather Workbook is a fully yours to edit and copy as you need. This is a service we provide to our customers to use as a weather data download tool, query builder or as a starting point for a custom workbook designed for specific users. Most users will start by keeping all sheets from the Weather Workbook and simply copying or adding their own sheets that can refer to the weather data being fetched.
If you wish to move around the data entry cells onto another page or to co-exist with the date that is retrieved, you can simply Cut and Paste the data entry cells to another place in your workbook. NOTE: YOU MUST MAKE CERTAIN THAT THE NAMED RANGE OF THE ENTRY CELL REMAINS INTACT ON PASTE. If the name is the same, it will be pasted into the URL Query just as before. For example, if you want to move the Locations List you can select the entire green section (note the name of this section) and simply cut and paste elsewhere in the workbook.
Just remember that the URLs are constructed by referencing these fixed named areas so they must exist and be populated somewhere in the workbook. To see the name of the entry cell, just click on it and see the defined name as we did above.
The Future of Weather Workbook
The Weather Workbook is provided as a courtesy to our customers and is not a supported product. However, we will help any customer as needed to ensure your success with retrieving weather data. As additions are made, new versions will be released into the download site.