

One of the powerful features of the Visual Crossing Weather Service is the ability to query data via a Web Service or URL. This benefits not only coders but rather can be utilized to import data into most Business Intelligence Systems including Excel. When you include your data into Excel, you can refresh the data or refer to it from other Sheets to pull out specific time periods or weather variables as needed. In this document, we will show you the basic steps required in loading this data.
Before we begin, if you want to see our Weather Workbook which is a complete weather query system built into a single Excel Workbook, please take a look at our blog explaining how the Weather Workbook can be downloaded and used in our Weather Workbook for Excel article.
Let’s continue on building our own simple query here…
Building the Query
All Queries can be built using the query builder page which is shared with the weather data download page. Just visit: https://www.visualcrossing.com/weather-query-builder/
Upon first visit you will need to register for an account. Free trials are available and it only takes an email address to sign up. If you need help signing up, please review How to Sign up With Weather Data Services.
Once you are signed in you can visit the Query Builder link from the Visual Crossing home page. If you have never run a query before you will be prompted to enter a location for your weather data:

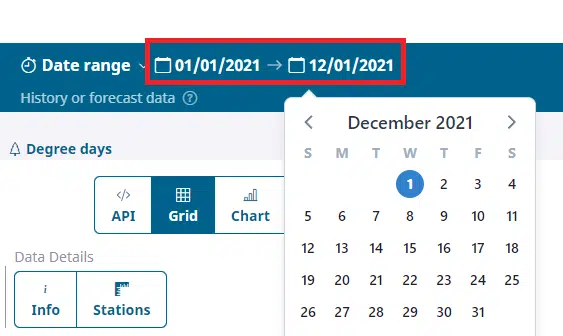
Once on the main Query Builder page, you can build the query you want to get data for. We will choose data for all of 2021. To do this, we choose the ‘Date range’ option in the top section of the header.

Now we will pick our start and end dates:
Once completed we will immediately see the results of our query in the Data Grid Viewer. If we are happy with the results, instead of choosing to download the data we will click to view this query as “API”.
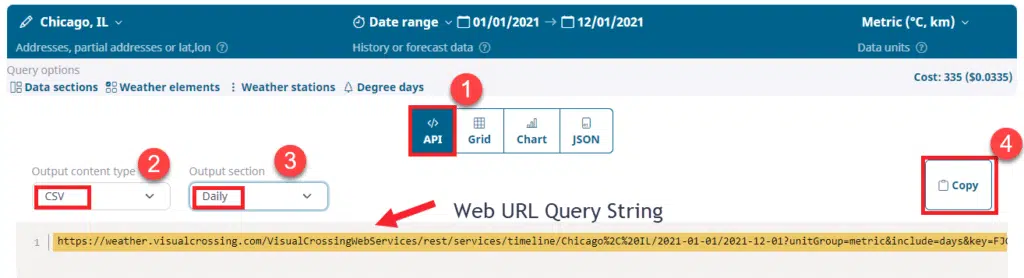
From this page we can see the Web URL Query String that we need to copy into Excel. First we have to make sure that we choose “CSV” as the output type (JSON is possible but needs import script modifications in Excel) and for this simple query we will choose to query for “Daily” data.
Now we can simply click the “Copy” button.

You should see the above message letting the user know that the URL String is in their system copy/paste buffer.
Next we open up a new Excel Workbook and follow these steps:
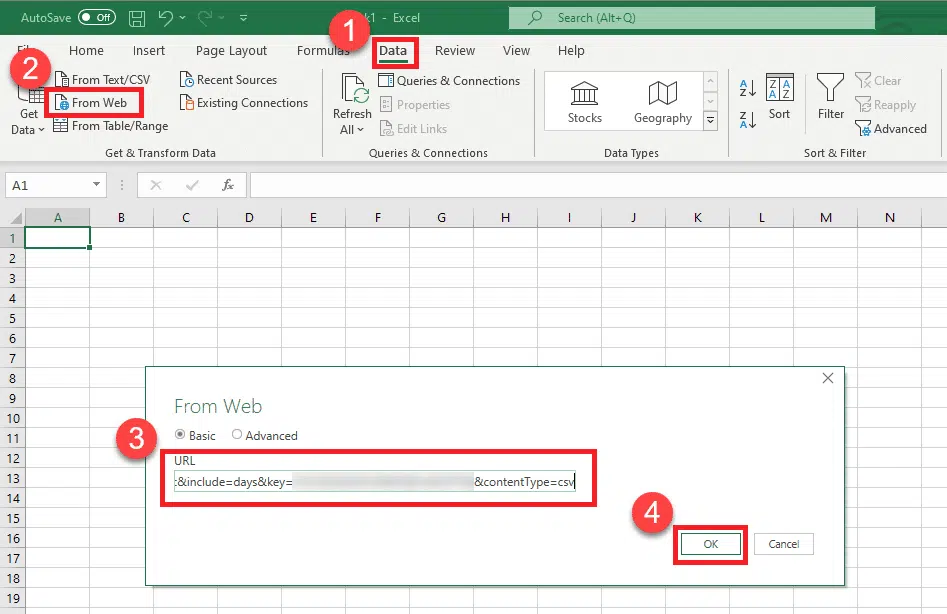
First navigate to the “Data” menu in the Excel ribbon. Choose the option “From Web”, which tells Excel that it would like to create a PowerQuery loading script from a URL Query string. Paste our string from the Query Builder into the “URL” text area and click “OK”.
This will bring up a preliminary data window with our data loaded into a result table.
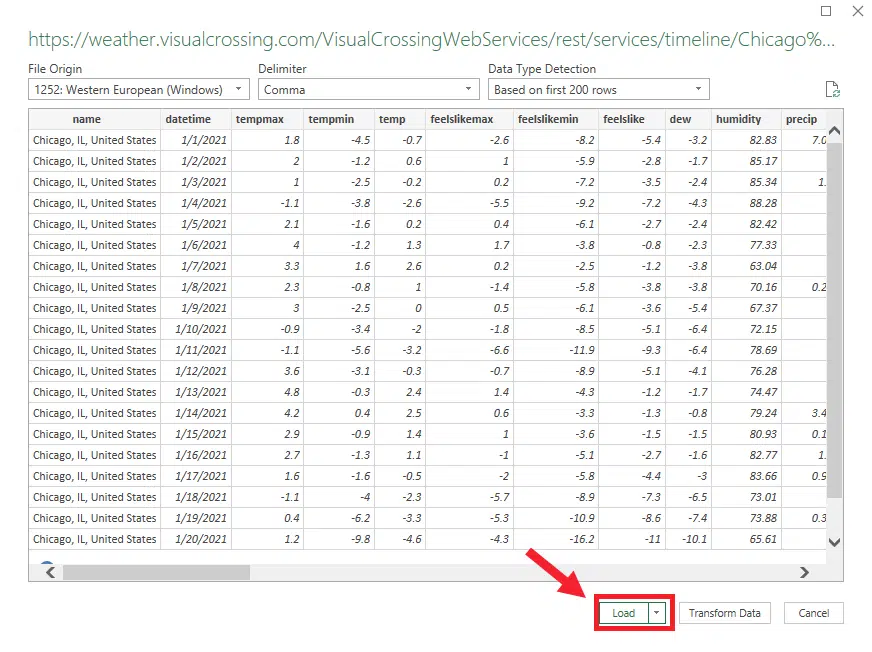
At this point, we can choose to do more advance ETL operations such as manipulating data or data types. You can also choose to load this table into Excel items such as Pivot Tables. For our exercise, we will simply click “Load” which will load our table of weather data into a standard Excel table in a new sheet.
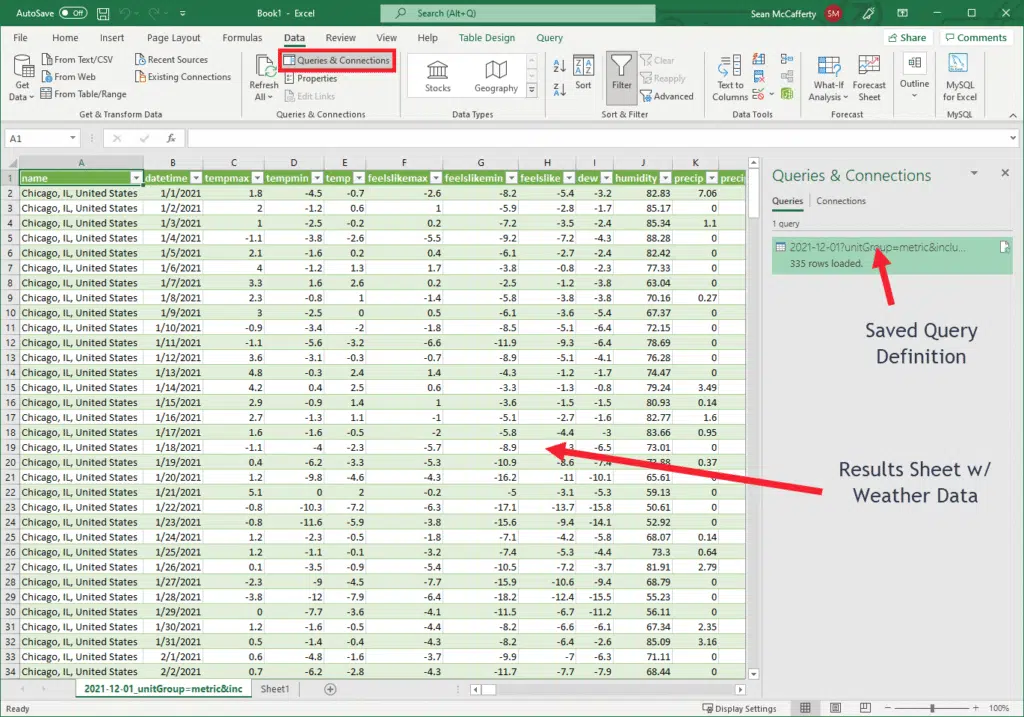
The query definition is a saved object that can be refreshed any time. If you open the Query & Connections page, you can edit this query and have full access to the Power Query system to manipulate the date and parameterize the query for more dynamic operations.
For further reading, check out How to Automatically Refresh Weather Data in Microsoft Excel.
Questions or need help?
If you have a question or need help, please post on our actively monitored forum for the fastest replies. You can also contact our Support Team.