

Swift is the key development language on Apple platforms replacing the older Objective-C as the goto language for Apple’s desktop and mobile platforms. Given its importance especially on mobile platforms, it is natural that Swift developers would want to load weather data into their applications. Luckily, frameworks available in Swift’s make it easy to compose and execute web queries and also easy parse the JSON results directly within any Swift application. In this article we’ll show you how to load and use weather data within your own Swift applications.
This guide assumes that you already have a Visual Crossing Weather account. If you don’t already have one, however, it is free and easy to sign up. Simply provide your email address, obtain your API key, and you will be ready to follow the steps below to load weather data using Swift.
Building a weather query URL
The first step in loading weather data using Swift code is to create a weather query URL. You can do this in various ways including by using our web-based query page. Simply define your query in the interface, and the page will generate the query URL for you. Alternately, the weather query can be constructed either manually or in code by using the guidelines in the Weather API documentation.
One of the easiest weather queries and the one that we will use in the remainder of this guide is a simple Timeline Weather query for the 15-day forecast. In the URL for this query, we only need to specify the target location. If we don’t supply a start and end date, the weather engine will infer that we wish to query the forecast. That query URL uses this form:
https://weather.visualcrossing.com/VisualCrossingWebServices/rest/services/timeline/<LOCATION>?key=<YOUR_API_KEY>
Simply replace the <LOCATION> placeholder with your query’s target location, for example, Paris, France and the <YOUR_API_KEY> with the API Key for your Visual Crossing Weather account. If my API Key is 1234567890, I can use the follow query to obtain the 15-day forecast for Paris.
https://weather.visualcrossing.com/VisualCrossingWebServices/rest/services/timeline/Paris?key=1234567890
Of course, this query is the most basic weather query example possible. I could add to it by changing it to query any global location on any date, past, present, or future. To learn more about the Timeline Weather API and the available options and parameters, see the API documentation. It is useful to get familiar with the API options because you will often want to build query URLs in your own Swift code instead of using hard-coded URLs. Using the documentation, you can assemble the URL parameters easily to create all types of custom and dynamic queries.
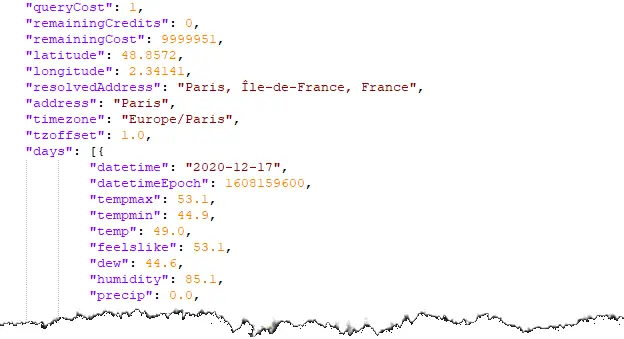
One key benefit of a URL API is that you can test the query URL in any browser and instantly see the JSON result. The Paris query example will generate a result that looks like this.
Executing a query URL in Swift
Once you have a weather query URL either created manually, via the weather query page, or constructed in your own Swift code, you are ready to run this query. The primary way to manipulate URLs and retrieve the results for a URL query in Swift is to use NSURL. You can use NSURL to build a URL piece by piece in your Swift application, which is what an advanced application would want to do. However, in this example, we will use the entire query URL as a single, static string. When you get the basics working you can then upgrade to constructing the the URL from pieces and parameters.
The loading process using this scheme is quite simple. We first create a URL based on our URL string. Then we use NSURL’s URLSession to create a dataTask that will do the work of sending the URL request and fetching the weather data results. In this part of the example, we stop after getting the query response body back as a our data variable.
Here is an example code snippet that shows the necessary steps.
let session = URLSession.shared
let url = URL(string: "https://weather.visualcrossing.com/VisualCrossingWebServices/rest/services/timeline/Paris?key=<YOUR_API_KEY>")!

let weatherTask = session.dataTask(with: url) {
(data, response, error) in
    guard let data = data else { return }

    /// Process the weather data
}

  weatherTask.resume()
Parsing JSON weather results in Swift
Now that we have the weather data available to us as delivered in the query response data value, our final step before we can use the data is to parse it as JSON. Fortunately, this is also quite easy in Swift using functionality that is built in. In fact, there are several different ways to accomplish this, and your choice depends in part on on the version of Swift that you are using. Apple has a blog article from a few years ago that goes into detail on this very topic using an older approach. In our simple example here, we will show the most basic technique using the JSONDecoder method, but be aware that there are various options that support more sophisticated JSON manipulation in Swift. For more details, on the latest options, see the Apple Swift documentation.
To show how to deserialize the weather JSON, we’ll pick up the sample code above from where we left off. The code below will go in place of the “/// Process…” comment above. The first step will be to define structures to describe the weather JSON. In Swift we don’t need to fully define every parameter that appears in the JSON. We only need to define the ones that we care about. In this simple example we care about the resolved address returned from our query and some of the measures returned for each forecast day. So, we define two structures. The first is the overall weather JSON while the second one defines each day element in the days array. (Note that there are many more weather measures available in the result JSON. We’ve simply limited the scope here to a few as an example.)
Once we have the structures defined, we can then ask JSONDecoder to do its decoding work for us. We simply give it the top-level structure and the data returned from the query URL. JSONDecoder will parse the JSON into the structures that we have defined and ignore the JSON elements that we didn’t request in those structures.
We can now print out some of the weather data to show how easy it is to read the parsed values. From the top-level JSON, we print the location detail. Then from each day in sequence, we print a few of the weather measures. Of course, this is just the beginning of what our code can do with the data. For example, we could take the condition description, temperatures, and rainfall chance to produce a weather display on a mobile app. Alternately, our code could iterate through all of the available measures and feed the dataset into a custom data analysis engine to make decisions about business activities such as staff scheduling or energy monitoring. Once the weather JSON has been read into appropriate structures, its use is limited only by your Swift code.
    struct WeatherData: Decodable {
         let resolvedAddress: String
         let days: [WeatherDays]
     }

    struct WeatherDays: Decodable {
         let datetime: String
         let tempmax: String
         let tempmin: String
         let description String
     }

    let weather: WeatherData = try! JSONDecoder().decode([WeatherData.self, from: data)

    print("Weather forecast for: weather.resolvedAddress)
    for weatherDay in weather.days {
         print("Forecast for date: ", weather.datetime)
         print(" General conditions: ", weather.description)
         print(" The high temperature will be  ", weather.tempmax)
         print(" The low temperature will be  ", weather.tempmin)
  }
Summary
In this article you have seen how easy it is to create a weather query using Visual Crossing Weather, run that query in Swift, and then parse the JSON results all using functionality built into Swift. Once you have these parsed results, you are ready to use the data in your own weather use case. Since Swift is often used to build mobile applications and and user-friendly analysis tools, your next step might be to feed weather data into a mobile display or make an analysis application that can help users track the relationship between weather and their business activities or hobbies.
Of course, the forecast query example in this article shows only the most basic example of how to use the Visual Crossing Weather API in Swift. However, even from this simple query, you can read many different weather forecast measures and also the current weather conditions. In addition, the Timeline Weather API supports historical queries that can return weather reports from any global location for any time and date since 1970. Beyond that, our statistic (climate-based) forecasts allow you to see weather norms for any date across the entire year. When coding in Swift, you will be able to put this functionality and much more to work in any weather-enabled application.
Questions or need help?
If you have a question or need help, please post on our actively monitored forum for the fastest replies. You can also contact our Support Team.