

Visual Crossing provides the ability to retrieve up to 16 day forecasts for any world wide location based on address, zipcode/postcode or latitude and longitude.
In this article we discuss how to retrieve the full weather forecast for multiple locations in a single request. This makes it easy to import weather forecast information for many business locations into a database or other analysis product.
We will also consider how to automate the bulk weather forecast retrieval so that the data can be automatically retrieved on a schedule by script or application.
The following video also demonstrates similar concepts.
License considerations
Each plan of Visual Crossing Weather Data includes a maximum number of locations per request. Please consult the Weather Data Editions page for more information.
Bulk weather forecast retrieval in the Weather Data Services application
To retrieve the weather forecast for multiple locations in the weather data services page, we first create a text file that includes the locations of interest.
As a sample we will be using a file containing all the Zip codes in Washington, DC, USA. Zip Codes are similar to Postal Codes in many countries. In addition to zip or postal codes you could use full or partial addresses or latitude,longitude values.
Here’s the first few lines of our file:
Zip
20515
20222
20060
20224
20226
20064
...
The file is saved a CSV (comma separated value) file. As we have a single column, there are no commas!
To import this file into Weather Data Services, we can choose the ‘Import Locations’ option when adding locations:
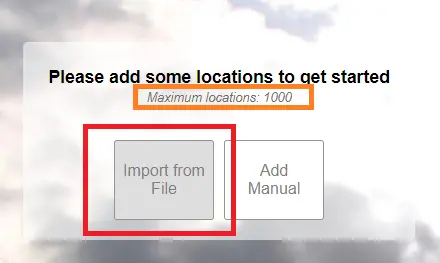
Note that the maximum number locations is displayed in the of the screen. This will depend on your subscription plan.
Select “Import From File” to import the locations from file.
This will display the next screen. Hit ‘Choose a file’ and choose the CSV file with the list of addresses.

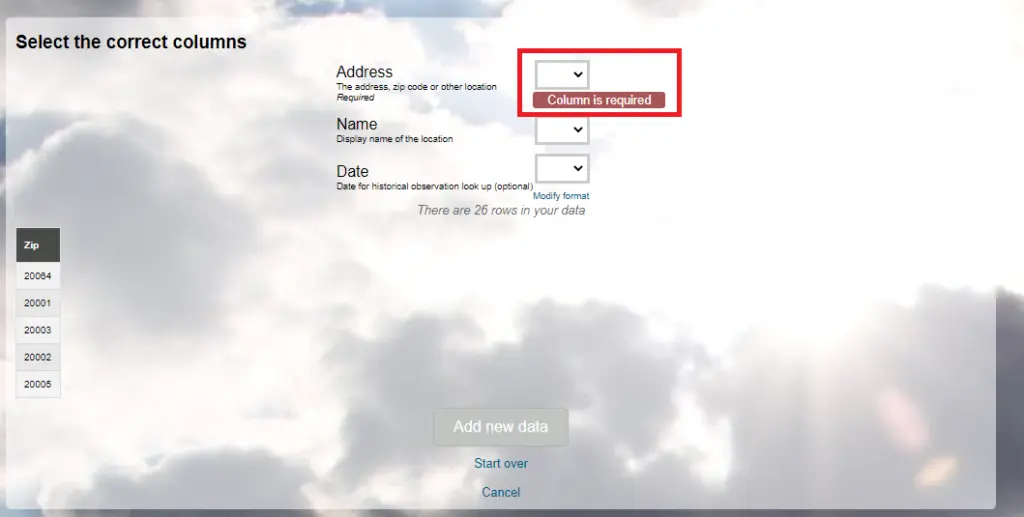
The file is then read by the system and a data preview is displayed. In addition, we can now tell the page which data to use for our location addresses. Notice that you can specify an Address, Name and Date as columns from the source file. In our case, we will only specify an Address. The Name can be used to help identify the locations in your dataset. The Date can be used to look up specific historical weather data.
We choose our single column as the address.
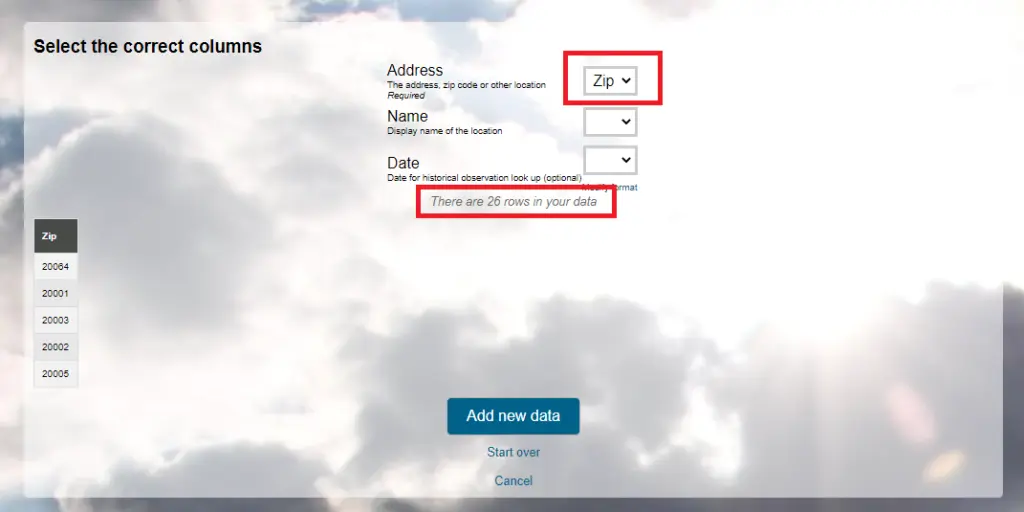
Note also that the column selection displays the number of rows in your dataset.
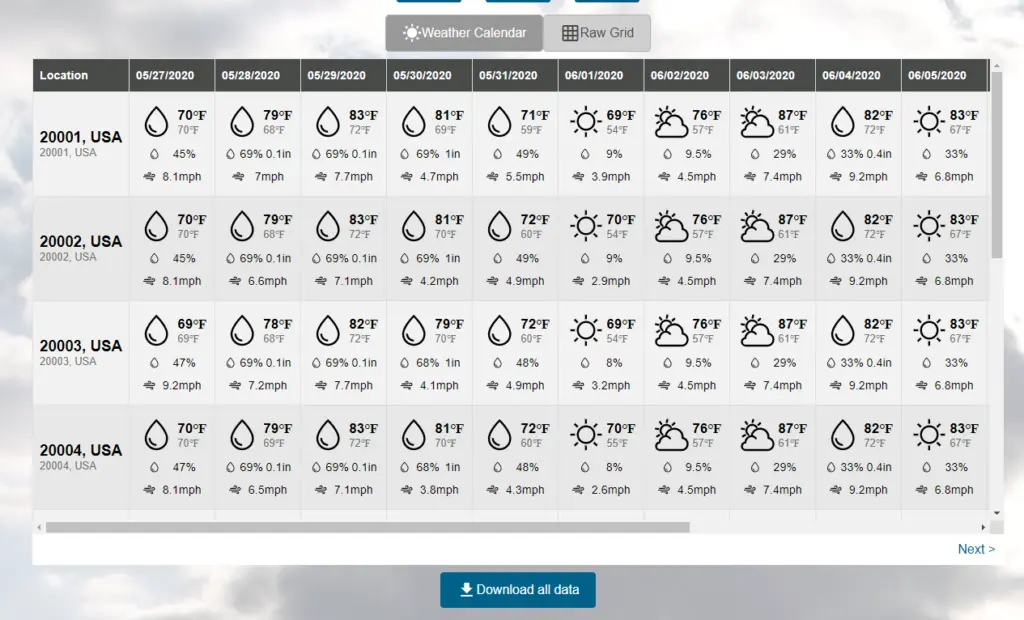
We can now hit ‘Add new data’ to finishing importing the locations. At this point, the daily weather forecast is loaded for the locations requested. At this point, the full dataset can be viewed in the browser or downloaded as a CSV to the client.
Automating the bulk weather forecast retrieval
The previous steps show how easy it is to request the weather forecast for multiple locations in the browser. In many cases it is preferable to automate this process so that the weather forecast data can be automatically uploaded into a database.
The Weather Data Services pages will generate the required Weather API request. To do this, we can generate the query by hitting the Query API button:
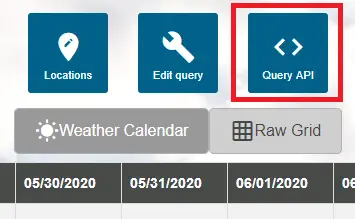
From here we can view and modify the API request.
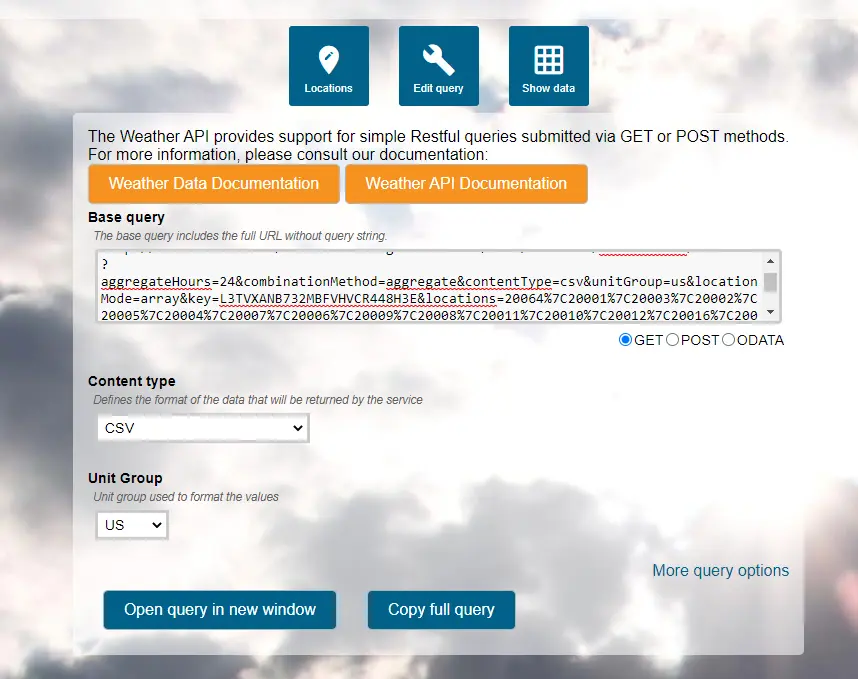
By default, the system generates a ‘GET’ style request that can be copied and pasted directly into a browser URL. Note however that there are length limits to the URL and so if you wish to request the weather forecast for many locations, or if you use full addresses for each location, you may need to use a POST style request. POST requests have less restrictions on the amount of data that can be sent to the server.
There are a number of different ways to automate the retrieval of the weather data so that is can be stored and then imported. One of those most common is to use the Python scripting language to import the data into a database.
Using curl to retrieve bulk weather data
curl is a command line tool available on Windows 10, LINUX and UNIX operating systems. Retrieving data as a POST request is straightforward.
First, use modify the query parameters to separate the URL of the request from the data. Select ‘POST’ as the query format. Also choose ‘Raw’ as the data format.
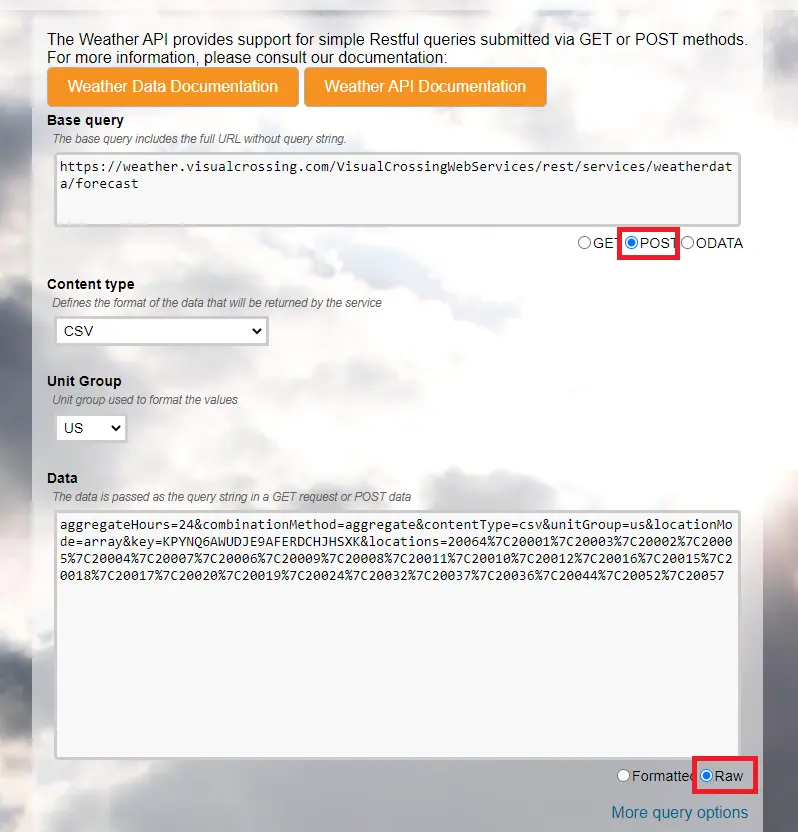
We can now use curl to request the data. The CURL command to download the abovfe weather forecast data is simply:
curl -d "{data}" {basequery} -o {filename}
We can fill in the data to request our final request:
curl -d "aggregateHours=24&combinationMethod=aggregate&contentType=csv&unitGroup=us&locationMode=array&key=KPYNQ6AWUDJE9AFERDCHAAAA&locations=20064%7C20001%7C20003%7C20002%7C20005%7C20004%7C20007%7C20006%7C20009%7C20008%7C20011%7C20010%7C20012%7C20016%7C20015%7C20018%7C20017%7C20020%7C20019%7C20024%7C20032%7C20037%7C20036%7C20044%7C20052%7C20057" https://weather.visualcrossing.com/VisualCrossingWebServices/rest/services/weatherdata/forecast -o output.txt
By scheduling this command, you can then retrieve the data whenever it is needed.
Other scripting environments
Depending on how you would like to use the data, other command line, scripting or programming environments may be more suitable. For other examples that use the same concepts as above to build the Weather API request, see:
- How to automatically refresh Weather Data in Excel
- How to import weather data into MySQL database
- Multi-site weather forecast in Microsoft Excel Workbook/
- Parameter Based, Web Queries in Excel
- How to add Weather Data to Google Sheets using a Dynamic Weather Query
- Automate recent weather history data retrieval using Microsoft Power Query
- How can I find weather forecast data for analysis in R?
- How can I download weather forecast data as a CSV file?