

In many cases, it is very useful to be able to schedule a weather query to run for you periodically and then deliver the latest data directly into your analysis. Imagine having the forecast for all of your business locations updated fresh each morning in your Excel sheet right before your planning meeting? Consider a database load script that automatically refreshes the last week of historical data to pick up updates that come in during the first few days after the event.
All of these use cases and more are easy and take only a few minutes to set up using Visual Crossing’s Weather Query Builder scheduling functionality. If you are ready to set up a scheduled weather task or just want to understand the process, we’ll guide you through the steps below.
Prerequisites
In the this article we will assume that you already have run a weather query that you wish to schedule. If you have linked here from a guide that walks you though the query building steps, please jump to Step 1 below. If you have not already run a weather query in our Weather Query Builder, you can follow our step-by-step guide. When you finish building your query and get to the “Download the Weather Dataset” section, you can pickup right here and instead of downloading the dataset now, you can schedule it.
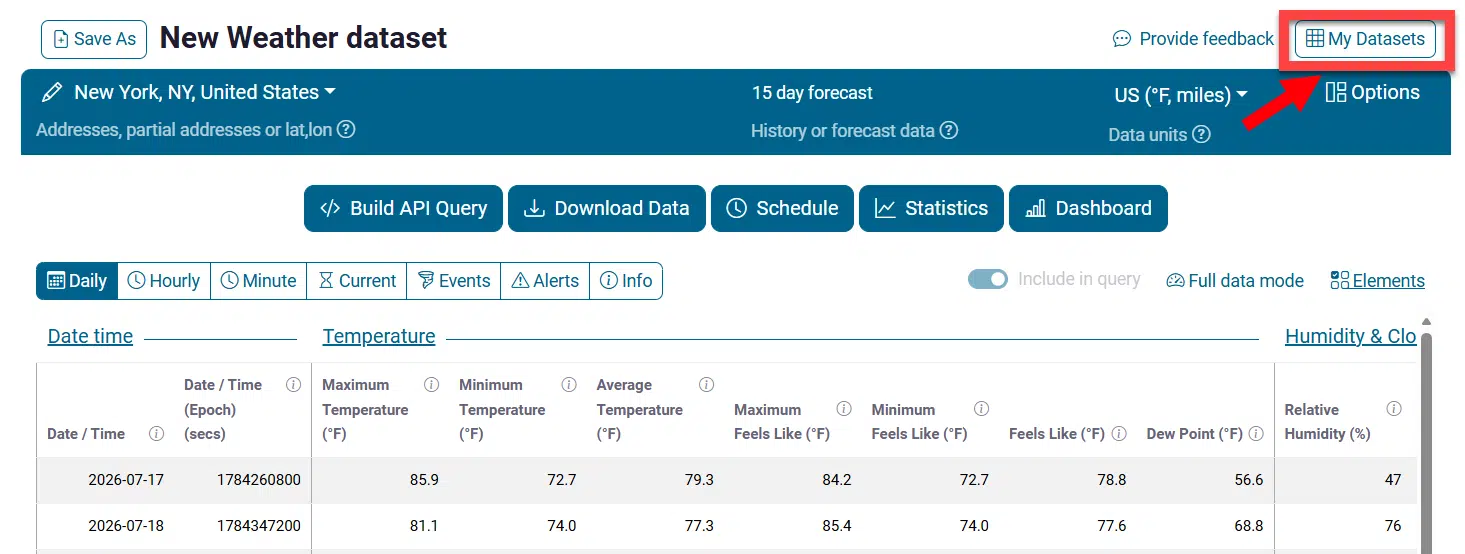
Likewise if you already have a weather query executed/downloaded/saved, you can load it from the My Datasets link in the upper right corner of the Weather Query Builder. Simply click on the saved query that you wish to schedule, and it will be loaded into the explorer view.
You may explore and adjust the query however you wish in explorer view. Once you are ready to set up your schedule, click on the Download button right beside the My Datasets button. You should then see a view that looks like the one shown in Step 1 below.
Step 1 – Configuring a schedule
No matter how you arrived at this point, you should now be looking a at a view similar to the one below. You may or may not see the step line from the Guide depending on if you are in the middle of a guided download query or in manual mode. However, the content of the page should be the same either way. Any query that you built can be scheduled so even if you are just testing with the default query that shows the forecast for New York, it will work the same way.
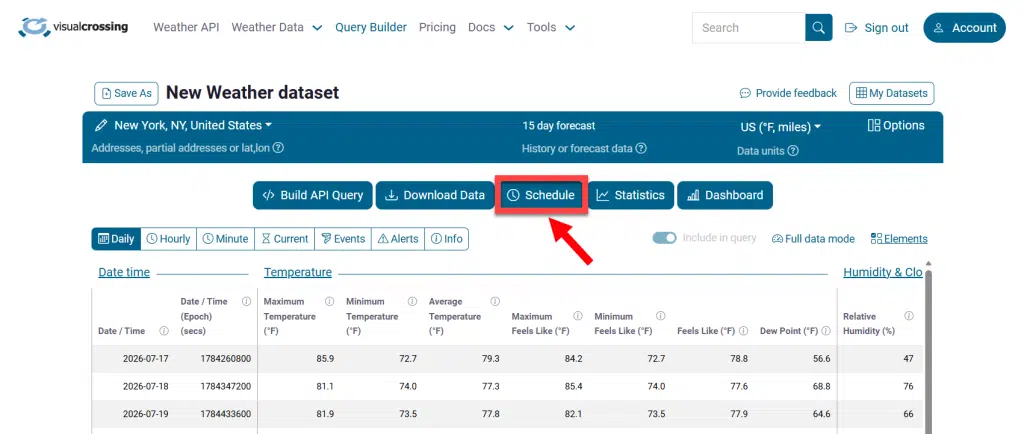
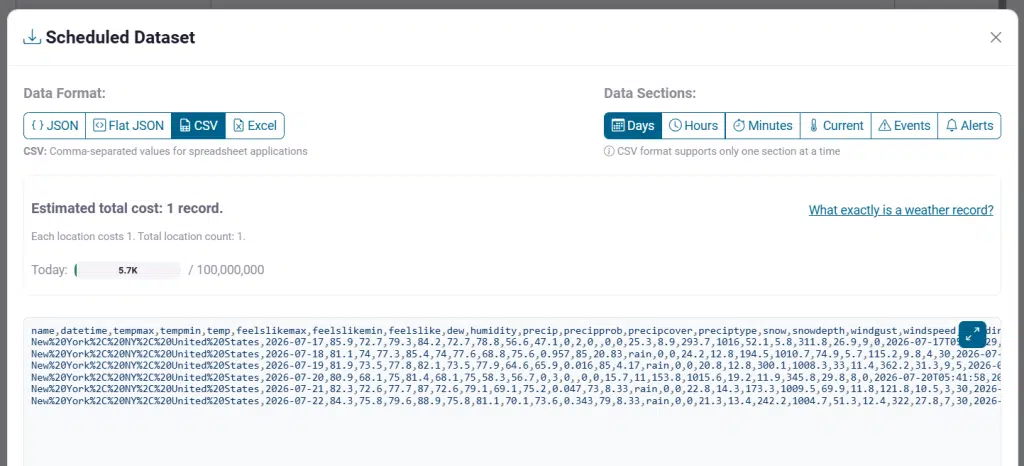
Instead of clicking “Download Data” on this page as you normally do to downloaded data immediately, click on the option beside it that says “Schedule.” You will see a similar page to the Download option that allows you to pick the format of the data as well as the section or sections that appear depending on your format type. Remember that JSON allows for multiple sections whereas CSV is a flat table of one section of data at a time. Both formats have benefits, but please keep this in mind when making your selection.
Clicking “Continue” at the bottom of the format/sections page will open the scheduling options allowing you to select the time of day. First you will want to name your dataset, then you can add times to your schecdule.
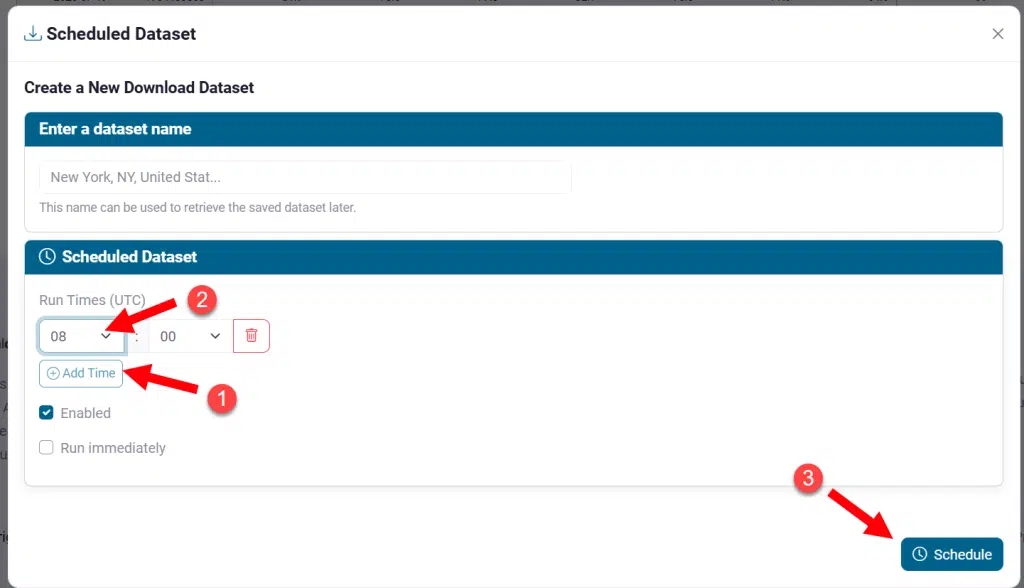
This selection represents that hour when the query will begin running every day and is based on your own local time. Many weather queries only take seconds to run. However, if you are using a long query that takes minutes or hours. you must factor that in when selecting the time. Your query results will not be ready to download until the execution is complete. To continue, simply pick a time from the dropdown selector that you wish your query to run.
Optionally you can choose to enable/disable your schedule to start today or later. Also rather than using two steps to download and then schedule the same dataset you can choose to “Run immediately” which will make the dataset available for immediate use rather than waiting for your first scheduled time.
Step 2 – Fetching data from links or directly
Once your schedule is saved and run either by clicking on the “Run immediately” button or by waiting until the scheduled time has past, you are ready to retrieve your results. One option is to manually retrieve them from the My Datasets page. To do so, simply enter the My Datasets page, locate your query in the list, and then click on the download icon on the right-hand side of the entry. (Note that the clock icon on the left-hand side indicates that this weather query is being run on a schedule.)
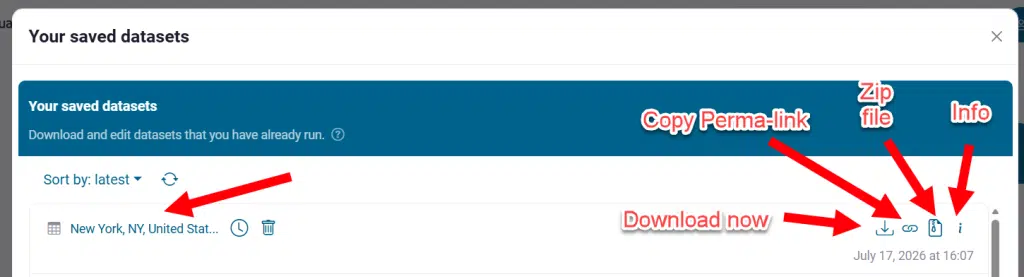
A better and more automatable way to retrieve scheduled query results is by using one of the queries download link URLs. You can get these links either from the query listing on the My Datasets page or from the Download page where you configured the schedule. If you are on the My Datasets page, you can get the links in the download links using the icons on the right-hand side. In the cluster of links on the right, working from left to right, the first one simply downloads the most recently executed data. The second one copies that download link also known as a “Perma-link” to the clipboard. It is named such because the link location doesn’t change with each run of the schedule. Simply reference the link URL to retrieve the latest scheduled run of data. This way you will always have latest.
This is the query link that you will generally want to use to load data into analysis tools such as Excel, Google Sheets, and business intelligence applications. The third one copies the link to the Zip file containing separate files for each location. Consider this option for database ETL and similar use cases.
If you chose to “Run Immediately” or you were using the download option rather than the scheduler, you will notice that you will be redirected to a query result page that allows you to download without going to the “MyDatasets” page:
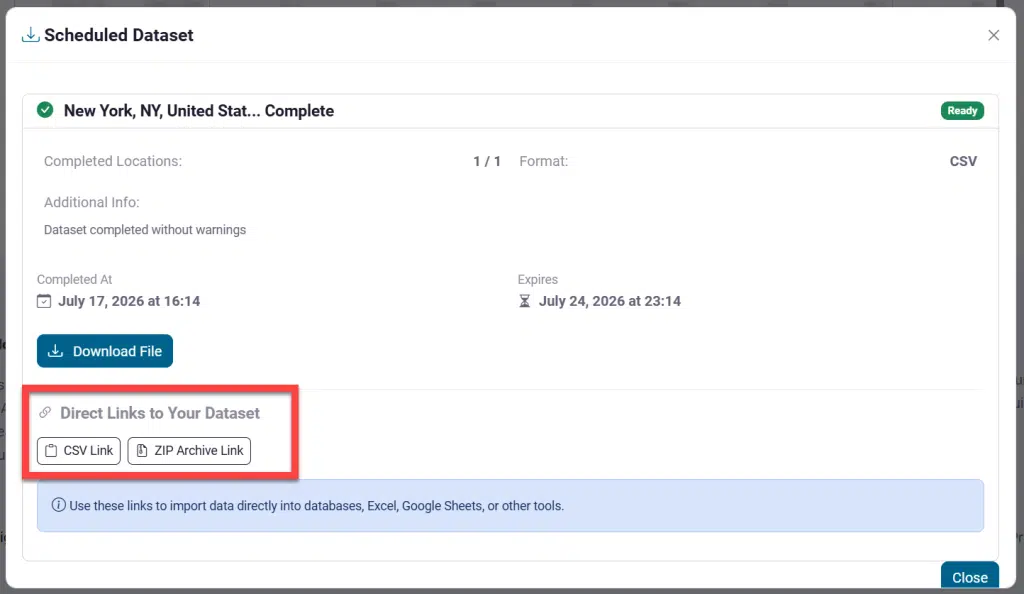
This page also offers the links to the resultant datasets just as you saw above. It is very important to note that these links do not cause a weather query to be executed again. They simply retrieve the results from the last time that query was executed. This is valuable for at least two reasons. The first reason is that downloading from a dataset link does not incur a query charge against your account. The second is that, unlike an API query link, you do not need to wait for a weather query to run before you can retrieve the results. Since these links are retrieving a previously-run dataset, the data is available to download instantly.
This means, however, that the dataset must have been already run before it can be fetched via these links. If you have not either run the dataset manually or had a successfully scheduled execution run, the results will not be available. Another related point that is important to remember is that datasets will only be updated when they are run either manually or via schedule. That may sound obvious, but it has important ramifications. If you create a query that is the 15-day forecast and run it only once, that dataset will remain fixed as the forecast was on the day that you ran it. Any time in the future when you fetch the results with that URL link, it will return the same data until the query is run again either manually or by schedule. This is entirely unlike a normal API query URL that runs fresh data every time you retrieve it. However, that is the power of scheduling. To avoid being surprised by outdated data, simply schedule your query to run periodically. Please note that even with live URLs (non-scheduled/saved) you can achieve dynamic URLs by using dynamic dates such as “Today”. However it is important to know when your query has last run or will trigger a new run. This is one of the key advantages to scheduling, your perma-link to the dataset will always have the latest run from the time you set.
What’s next?
Once you have mastered scheduled weather queries, you will find them to be valuable in many situations. Any time that you have a long query that you don’t want to worry about waiting for completion in your code or script, a scheduled query will make your task much easier. Often you want certain weather data to be available at a set time every day. Consider the case of having fresh forecasts available in your Excel planning sheet every morning before your planning meeting. Now you can simply compose your query complete with all of your business locations, and schedule it to run every morning at 6am. When you open your Excel sheet at 7am, the latest forecast data will be loaded.
Another use is in database loading scripts. You can simply compose the appropriate weather query once for all of your business locations and let your ETL script fetch the data from a scheduled query that runs every night. This ensures that the correct data is already available for loading and your script doesn’t need to worry about waiting for the weather query to complete. Even better, the weather query itself can be updated at any time via the Query Builder web-based interface. Anyone can update the locations in the query without needing to know the details of the ETL code. There are countless uses for scheduled queries, and, as you can see from the discussion above, the Weather Query Builder interface makes then easy to build, easy to schedule, and easy to retrieve in any analysis tool, code, or script.
Questions or need help?
If you have a question or need help, please post on our actively monitored forum for the fastest replies. You can also contact our Support Team.