

Aliaba Cloud DataWorks is an end-to-end big data development and governance platform that provides data warehousing, data lake, and data lakehouse solutions based on big data compute engines. Weather data is widely used in a variety of scenarios in data analytics and AI applications and hence often to be integrated in your data load scenarios.
A common path to integrate structured weather data is to synchronize it to a MaxCompute table using the RestAPI Reader. RESTful API is a self-managed API whose request method is GET.
NOTE: The RestAPI Reader requires the result data format of the Rest call to be JSON.
Sign Up and build your query string
To get started we need the query string to access the data from Visual Crossing weather. Queries can be built using the query builder page or for sure be put together manually using the API documentation .
To start either option, you will need to register for an account. Free trials are available and it only takes an email address to sign up. If you need help signing up, please review How to Sign up With Weather Data Services.
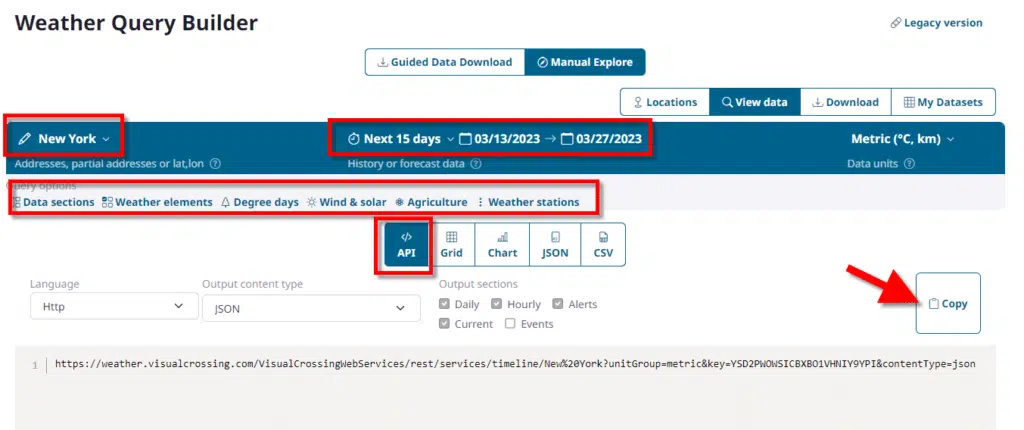
Once you are signed in you can visit the Query Builder link from the Visual Crossing home page.
Set the location, time-frame and result parameters you need for your analysis in your system.
After switching to the ‘API’ tab you simply can click the copy button to copy the query string to your clipboard.
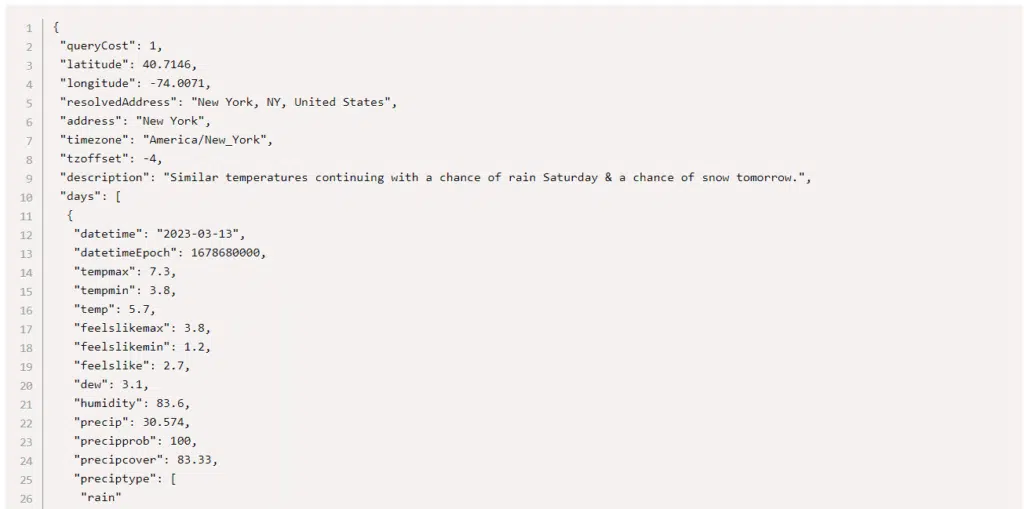
Sample response:
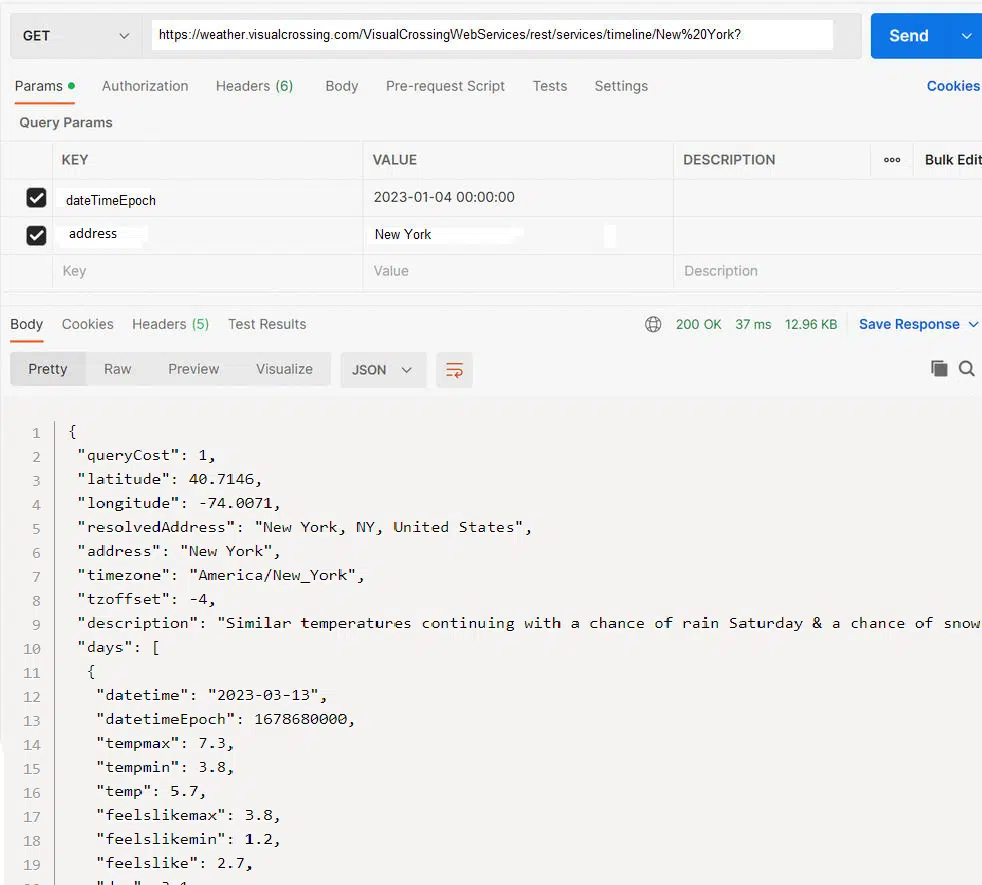
now you can test your API connection in the using the API test tool :
in the next step one needs to create the MaxCompute table with the corresponding key and value columns. Please see the MaxCompute documentation for details.
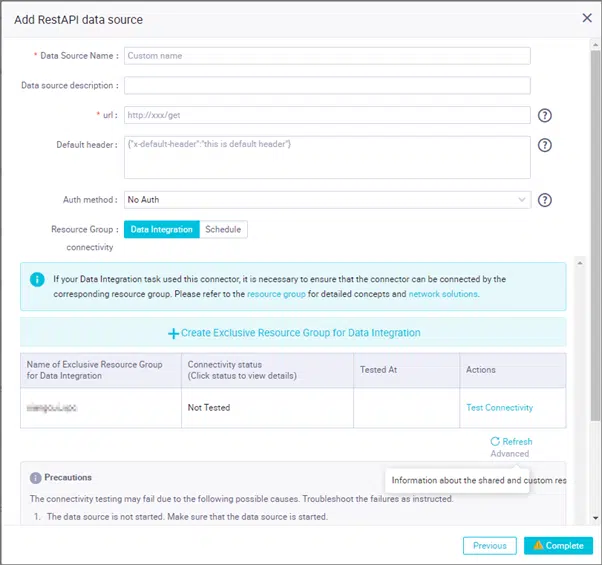
Before setting up the synchronization the Rest API must be added as a ” RestAPI data source “
Now you can create and configure a batch synchronization node.
On the DataStudio page of the DataWorks console, this can be achieved by using the codeless user interface (UI). For more information, see Configure a batch synchronization node by using the codeless UI.
Key configuration items for the source:
- Data source: You must select the RestAPI data source that is added in the preceding step.
- Request method: The request method of the RESTful API is GET.
- Structure of the response: The response returned by the RESTful API is a JSON array. You must set the structure of the response to array.
- JSON-formatted path for storing data: The fields that are queried by the RESTful API are stored in the data path. You must enter data in the field.
- Request parameters: You can use request parameters together with scheduling parameters to enable the batch synchronization node to synchronize data every day.
Key configuration items for the destination:
Data source and table: You must select the MaxCompute data source that you want to use and the partitioned MaxCompute table that is created in the preceding subsection.
Finally you can test the batch synchronization node by clicking the “Run with Parameters” icon in the top toolbar of the configuration tab of the node to test the node.

Questions or need help?
If you have a question or need help, please post on our actively monitored forum for the fastest replies. You can also contact our Support Team.