

Especially in solutions that combine data analysis and visualization with collaboration and planning weather is a valuable asset to identify business dependencies as well as adjusting planning and organizing day to day work-schedules. This tutorial shows the necessary steps to load weather aggregated to postal code or other geographical entities.
Please see our YouTube Channel as well.
Step 1 – Log into Visual Crossing Weather Query Builder
The Weather Data Query Builder allows you to construct and preview weather datasets. You can then mark them for download in popular formats such as CSV or JSON or you can use an API to read the dataset.
Step 2 – Navigate to the my datasets download section
On the button list in the upper right corner click the ‘My Datasets’ labeled button. These are the datasets that you have marked for download.
Step 3 – Copy the data link to the data set required
You will see the list of available datasets. For additional areas or geographical aggregations please contact Visual Crossing Support
Click on the required data set list entry and on the following page click the ‘Copy link’ icon to copy the link to your clipboard. The advantage to use the link to the data versus simply downloading it and then upload the CSV file into the DOMO platform is the option to schedule the reload in DOMO so you have an automatic refresh of the data.
Step 4 – Log into DOMO Business Cloud and define the data source
Once logged in into your DOMO Business Cloud select the ‘Data’ icon from the menu bar.

On the following screen select the ‘File’ option to proceed.

Step 5 – Set the parameters for the CSV Data connector
On the ‘Add new data upload spreadsheet’ click the ‘More Upload Options’ button.

This will open the ‘Data connectors’ panel. Select the ‘CSV Advanced’ connector,
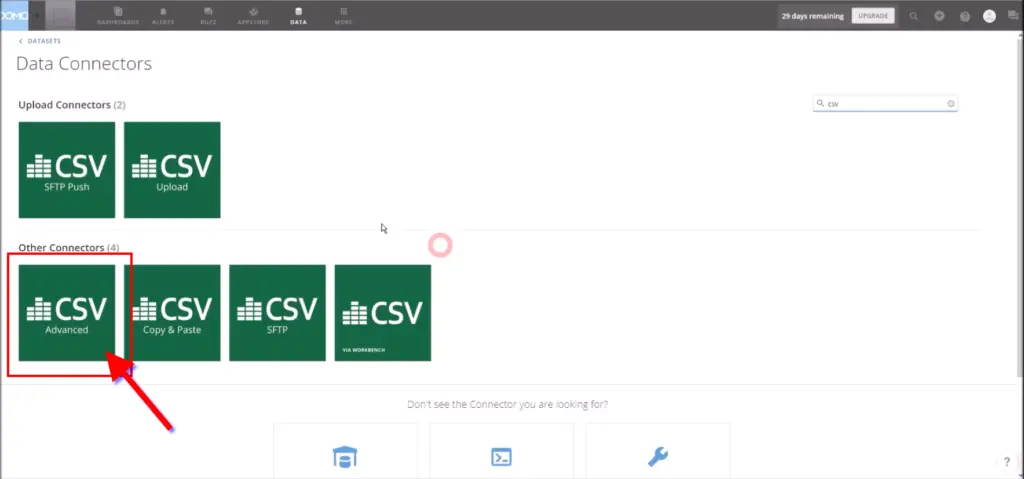
and click the orange ‘Get the data button’

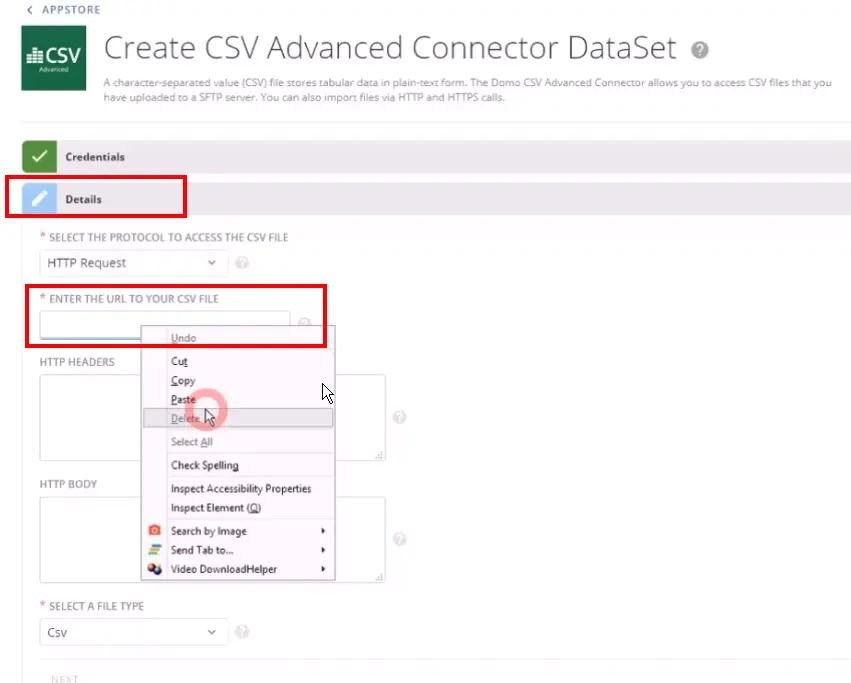
In the details section make sure your protocol is set to HTTP from the drop down and past the URL generated under Step 3 to the corresponding form field.
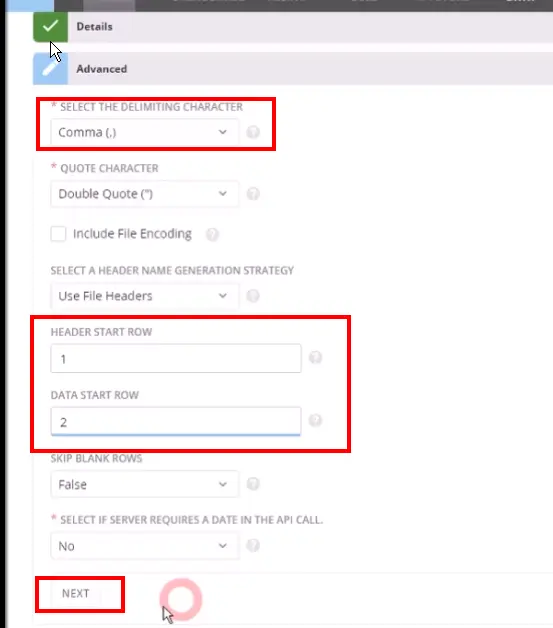
Additional settings to be set are in the ‘Advanced’ section where you need to confirm the delimiting character being set to ‘Comma’ and set the ‘Header Start Row’ to ‘1’ and the ‘Data start row’ to ‘2’. Click the ‘Next’ button afterwards.
Define your scheduling as required and click ‘Next’ again. The datasets are updated depending on the weather information included.

Finally name your data set and hit the ‘Save’ button.

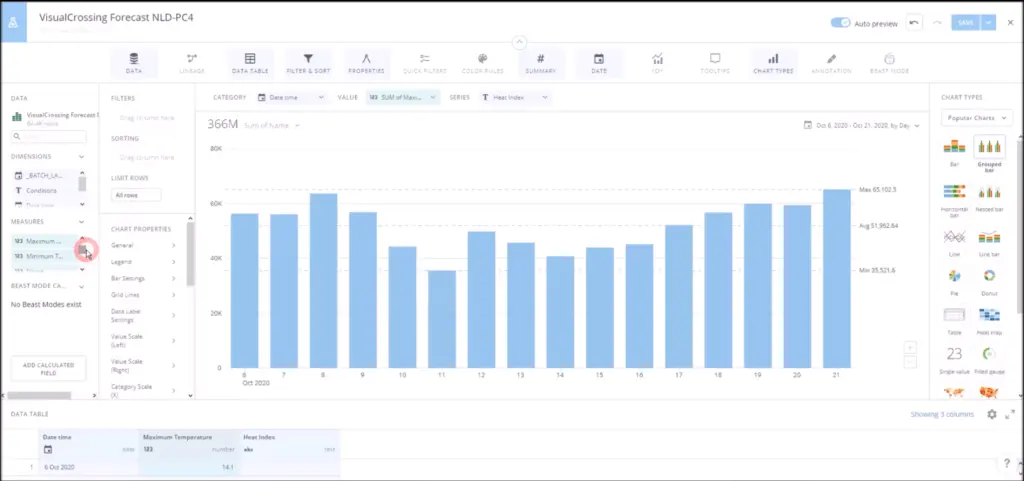
Step 6 – Create weather data analysis
Start your analysis by hitting the ‘Create Visualization’ button

Now you can utilize the full visualization power of the DOMO Business Cloud on your weather data set.
Closing thoughts
As you can see, importing weather data for the areas you run your business in into the DOMO Business Cloud is very straightforward.