

Using a weather API is an extremely powerful and flexible way to get weather data for any project. Whether you need historical data, forecasts, or current conditions, using an API allows you to automate fully automate the query process. There is no need to deal with web pages cluttered with ads or constantly updating an HTML scraping script. A weather API allow you to easily and safely embed weather data into any script or application and then reap the benefits for years to come.
In this article we will show you how to create and run your first weather API query. If you follow along, the whole process should take less than 10 minutes. Let’s go!
Why use a weather API?
An API is a way for different applications to communicate safely and reliably. So, a weather API is just a standardized way for applications to communicate about weather data. The power of an API is that it is documented and designed to be stable and reliable over time. Unlike manual lookups or screen scraping, a good weather API allows you to do a small amount of integration work now thereby saving repetitive, ongoing, and error-prove work in the future. It can also give you access to much more powerful and sophisticated weather data that can help bring additional value to your weather endeavors.
Building your first weather API query – Weather forecast
Getting started is usually the hardest part of any project, and it is this step that scares off many new weather API users. However, with Visual Crossing Weather, we’ve made the entire process easy. First, go to the weather query page and log into your account: https://www.visualcrossing.com/weather-query-builder/. If you don’t already have an account you can sign up for free in seconds.
Next, go into your account page by clicking on the Account button in the upper right. This will bring up a page that shows your account details and at the bottom you will see your API Key. Copy this key somewhere for safe keeping, and we’ll use it again in a few minutes.
Now it is time to build our weather query. Since Visual Crossing Weather uses a simple URL API, this is so easy that we can just build a query by typing into a text editor. We begin with the base query URL for the Weather Timeline API. That base is as follows:
https://weather.visualcrossing.com/VisualCrossingWebServices/rest/services/timeline
This base URL will be the beginning for every Timeline Weather query that we ever create. To this base will need to add the parameters that will define our weather query. In the case of the Weather Timeline API, these parameters are added as path components to the base URL. The first parameter is the location. For our first query, we’ll check the weather in Paris.
/Paris
That is all that we need to add to the query URL to select Paris as our query target. (Note that for simplicity we picked a city that is so well know that it can be looked up by its name alone, “Paris.” However, most of the time we’ll want to add a country and state to the city name or provide a complete address. In this case, we will need to “URL encode” the characters such as spaces and commas. Most scripting and coding languages have a method that does this for you. You can also do it manually via helpful web pages.)
All that remains in building this URL is to add our API key that we copied from our account above. We add that as a standard URL parameter at the end.
?key=<YOUR_API_KEY>
So, if our API key is “1234567890”, our complete query URL becomes
https://weather.visualcrossing.com/VisualCrossingWebServices/rest/services/timeline/Paris?key=1234567890
Running your first weather API query
The final step is to run the query so that we can get the results. This is easily done in any web browser. Simply paste in your query URL, and you should get a result that looks like this.
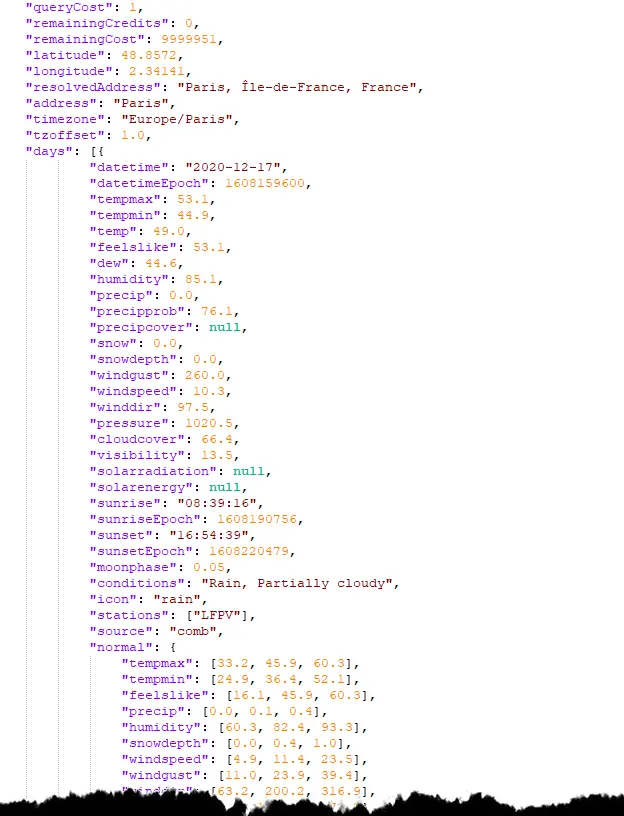
That is the 15-day weather forecast for Paris in JSON format. Your browser may not format it as nicely nicely, but if you paste it into a smart editor such the excellent Notepad++, you can see the data easily.
It is that easy to get a full 15-day weather forecast ready to use in your JavaScript, Python, or Java. Now lets make our query a bit more complicated.
Building your second weather API query – Historical Weather
We can easily turn our weather forecast query into a weather history query instead. All that we need to do is to add a date range. We’ll start with our base query URL again.
https://weather.visualcrossing.com/VisualCrossingWebServices/rest/services/timeline
And add in Paris as the query location.
/Paris
A history query needs a date or date range. If we include one date parameter, the weather results will be the weather only for that single date. If we include two dates, we’ll get weather data for that entire range of dates. Let’s query weather from January 1, 2020 to February 1, 2020. To our query URL we’ll add the starting date first and the ending date second like this.
/2020-1-1/2020-2-1
Finally, we need to add our API key just as before.
?key=<YOUR_API_KEY>
That makes our final URL (including the bogus “1234567890” API key):
https://weather.visualcrossing.com/VisualCrossingWebServices/rest/services/timeline/Paris/2020-1-1/2020-2-1/?key=1234567890
Running your weather history weather API query
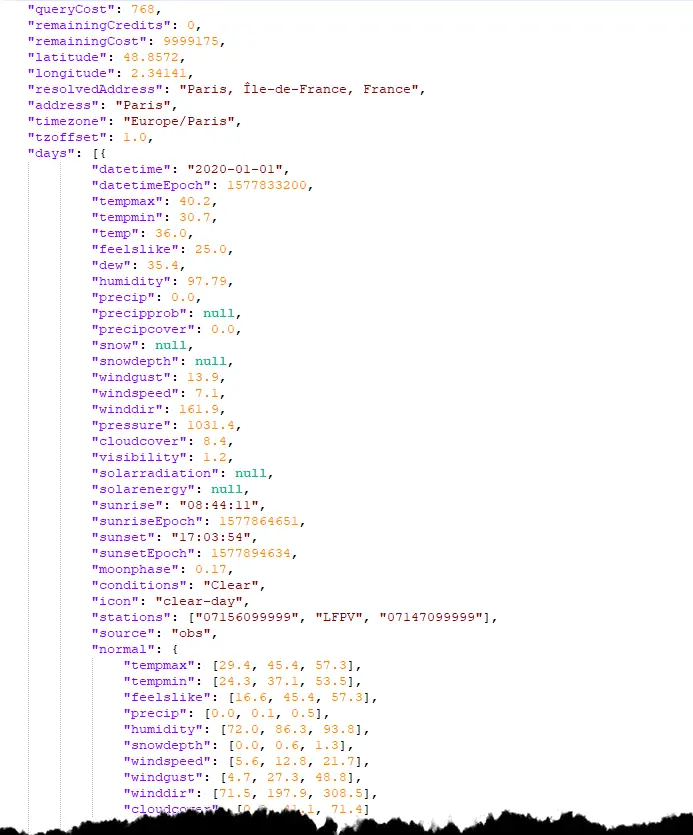
Just as before, paste this query into any browser to get your results. You will see a JSON that starts with weather records for 1/1/2020 and ends with 2/1/2020 records. After pretty formatting, it should look like this.
Where do we go next?
The answer is entirely up to you and your weather data needs. You next step could be as simple as updating the location and dates to match your weather use case and making a script to download the results vial cURL. You can also use the weather query URLs that you create in many different scripting languages and data science tools. Python, for example, has the ability to read data from a URL and parse it as JSON as does the statistical analysis language R. Excel can also read JSON data from a URL as can other business and analysis tools. Once you know how to easily make weather data queries, you will find uses for weather data in every data analysis task that you do.
The API itself has various options and additional parameters that were not discussed in this simple article. You can change the output unit system, use dynamic ranges, and control the types of data returned in the output. You can find all of the details in the Timeline Weather API documentation. Of course, if you have any questions or need additional help, please check out our resource library or reach out to our weather experts.
Questions or need help?
If you have a question or need help, please post on our actively monitored forum for the fastest replies. You can also contact our Support Team.